

Label Prep turns your label file into the transparent PNG Lite needs, and gives you the numbers that place it on your bottle. It's free, there's no account, and it runs in your browser, so your label never leaves your computer.
1. Upload your label
Drop your file on the page or click Browse. Label Prep opens PDF, Adobe Illustrator, Photoshop, PNG, JPG and TIFF files, and printer proofs are welcome.
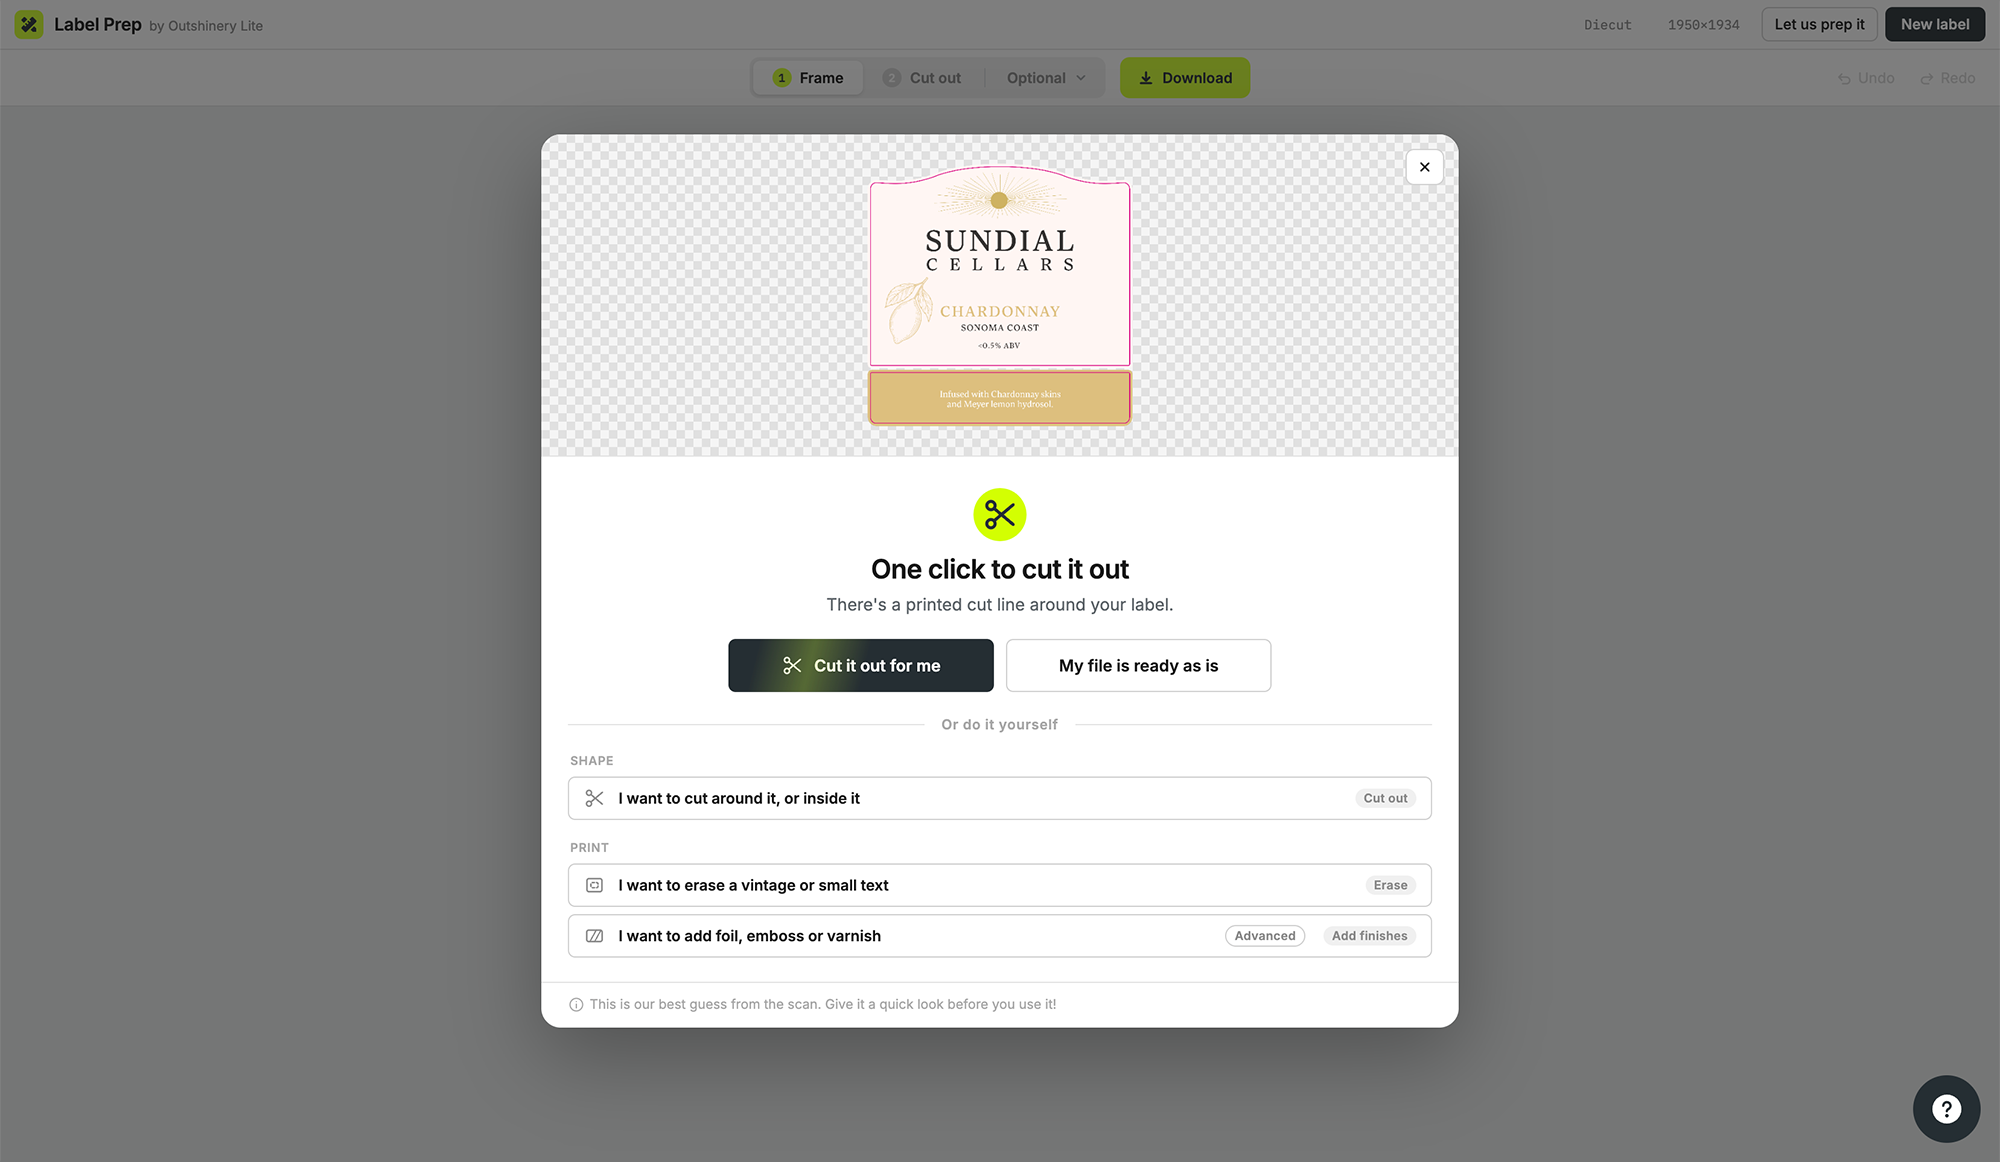
Label Prep scans the file and tells you what it found:
If your label sits on a sheet, with paper, a die cut line or crop marks around it, click Cut it out for me.
If your file is already just the label, click My file is ready as is.
With a PDF or Adobe Illustrator file, you drag a frame around the label first.
2. Check the cutout
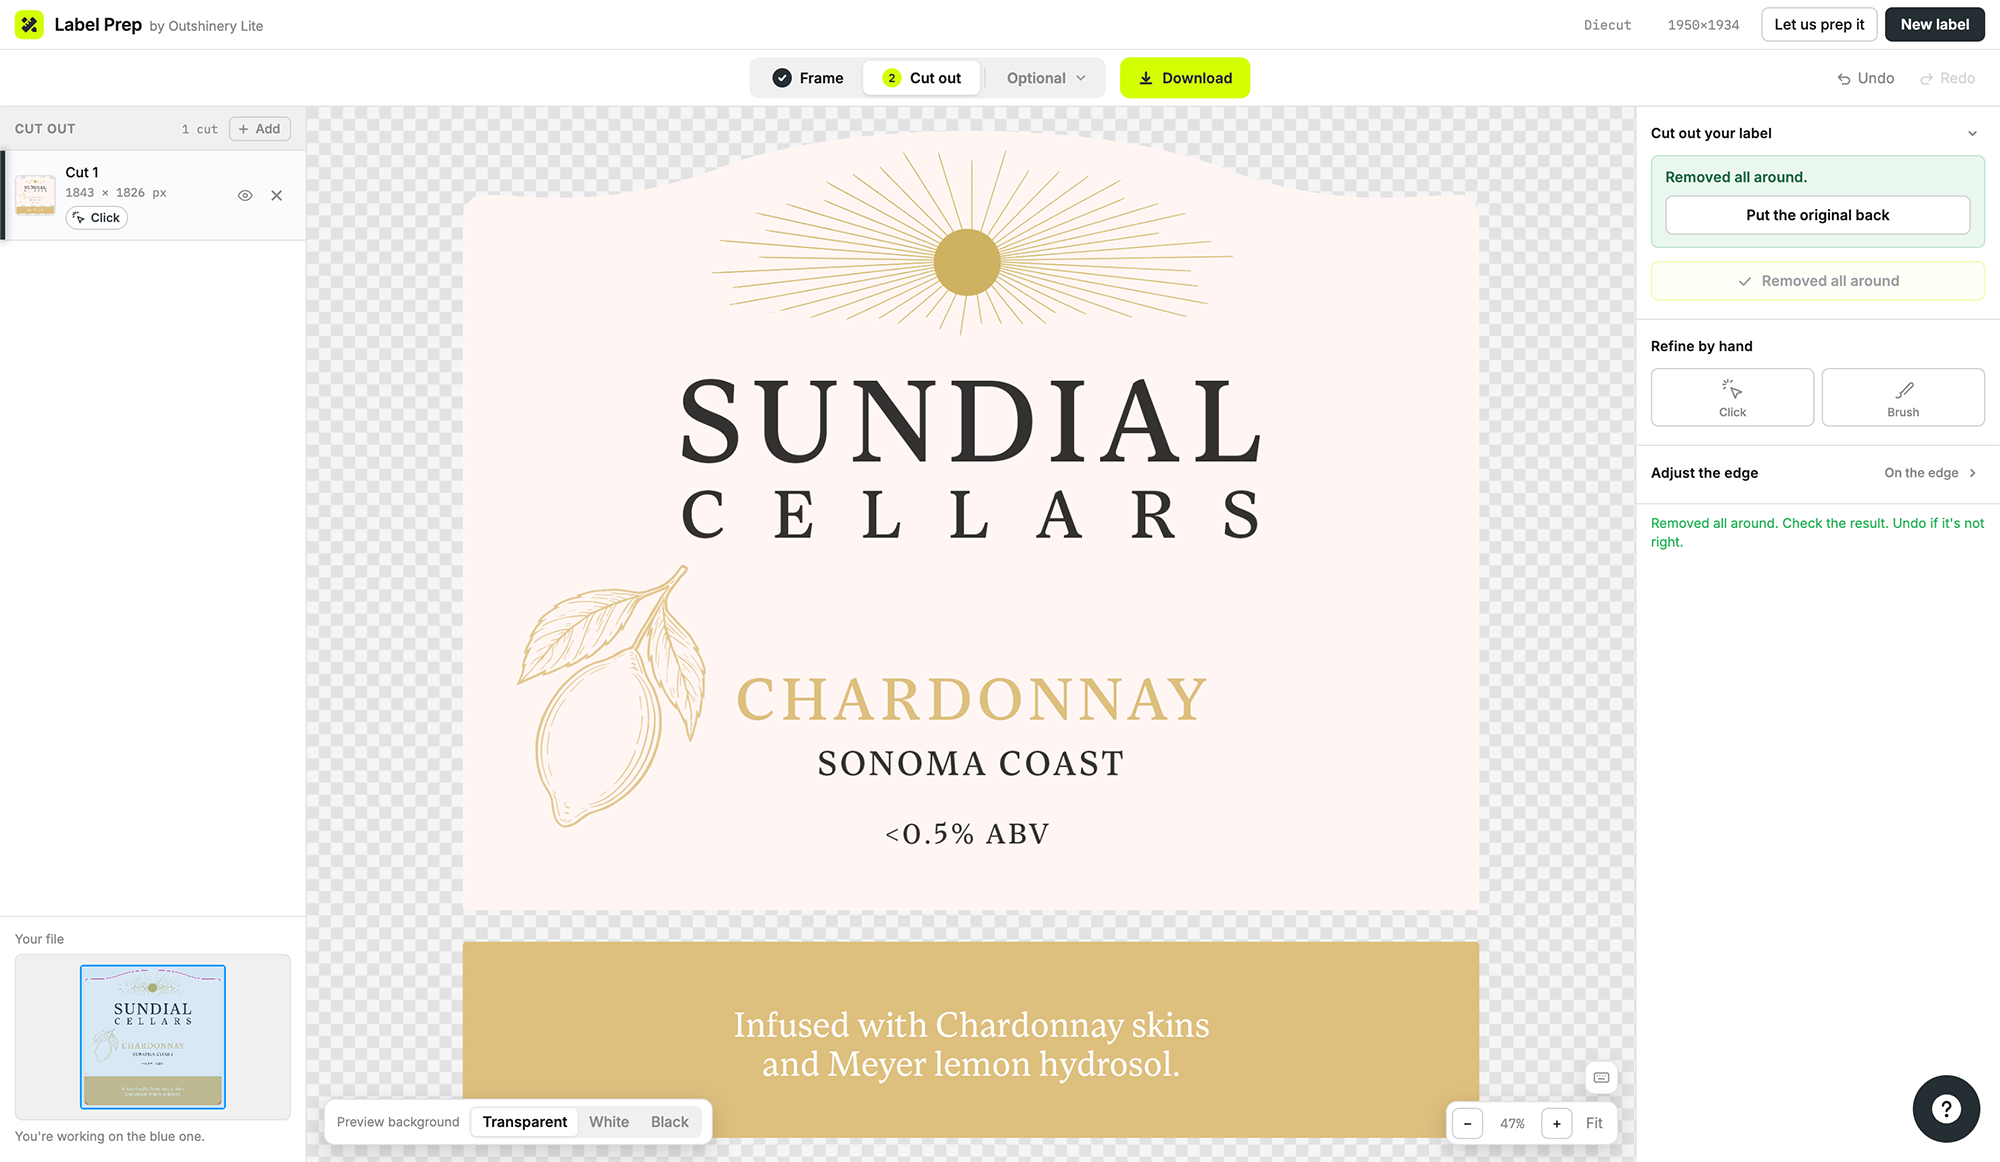
Look over the edges. If something isn't right, use Refine by hand with Click or Brush, or click Put the original back and start again. Undo works at every step.
3. Erase or add finishes (optional)
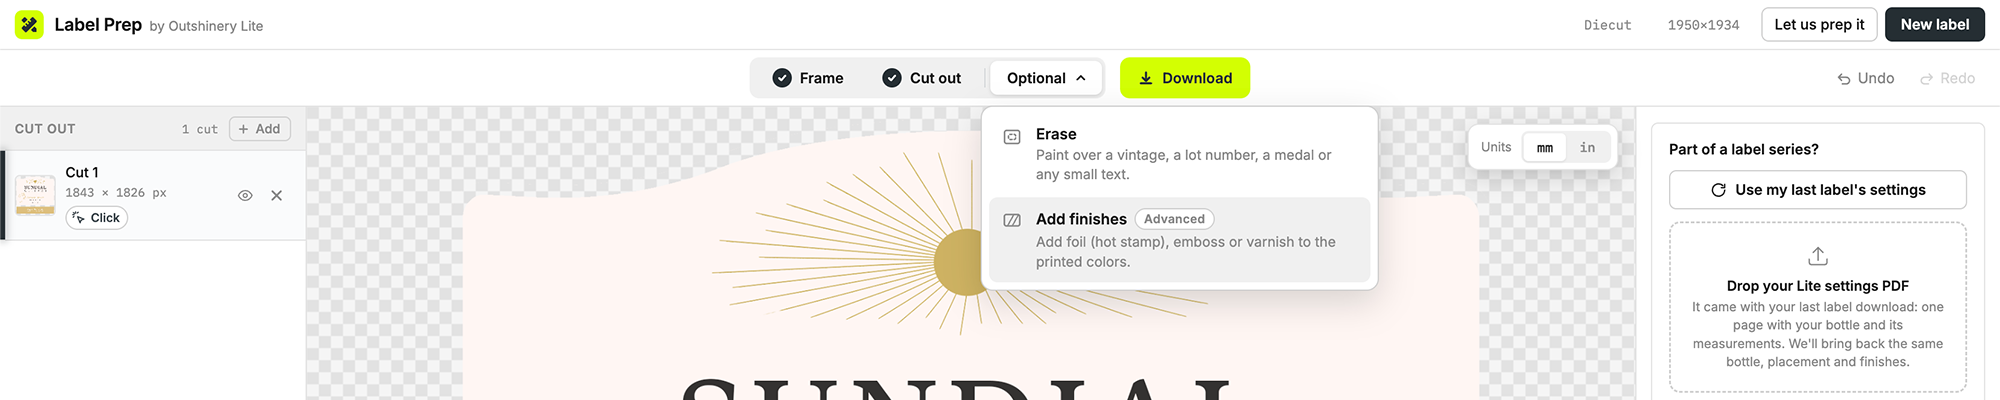
Open Optional at the top:
Erase paints over a vintage, a lot number, a medal or any small text.
Add finishes adds foil (hot stamp), emboss, deboss or varnish to the printed colors.
Finishes look convincing on your website and retail listings. When the finish is the star of the label, or the image has to match the printed bottle exactly, that's Outshinery Studio.
4. Place your label on your bottle
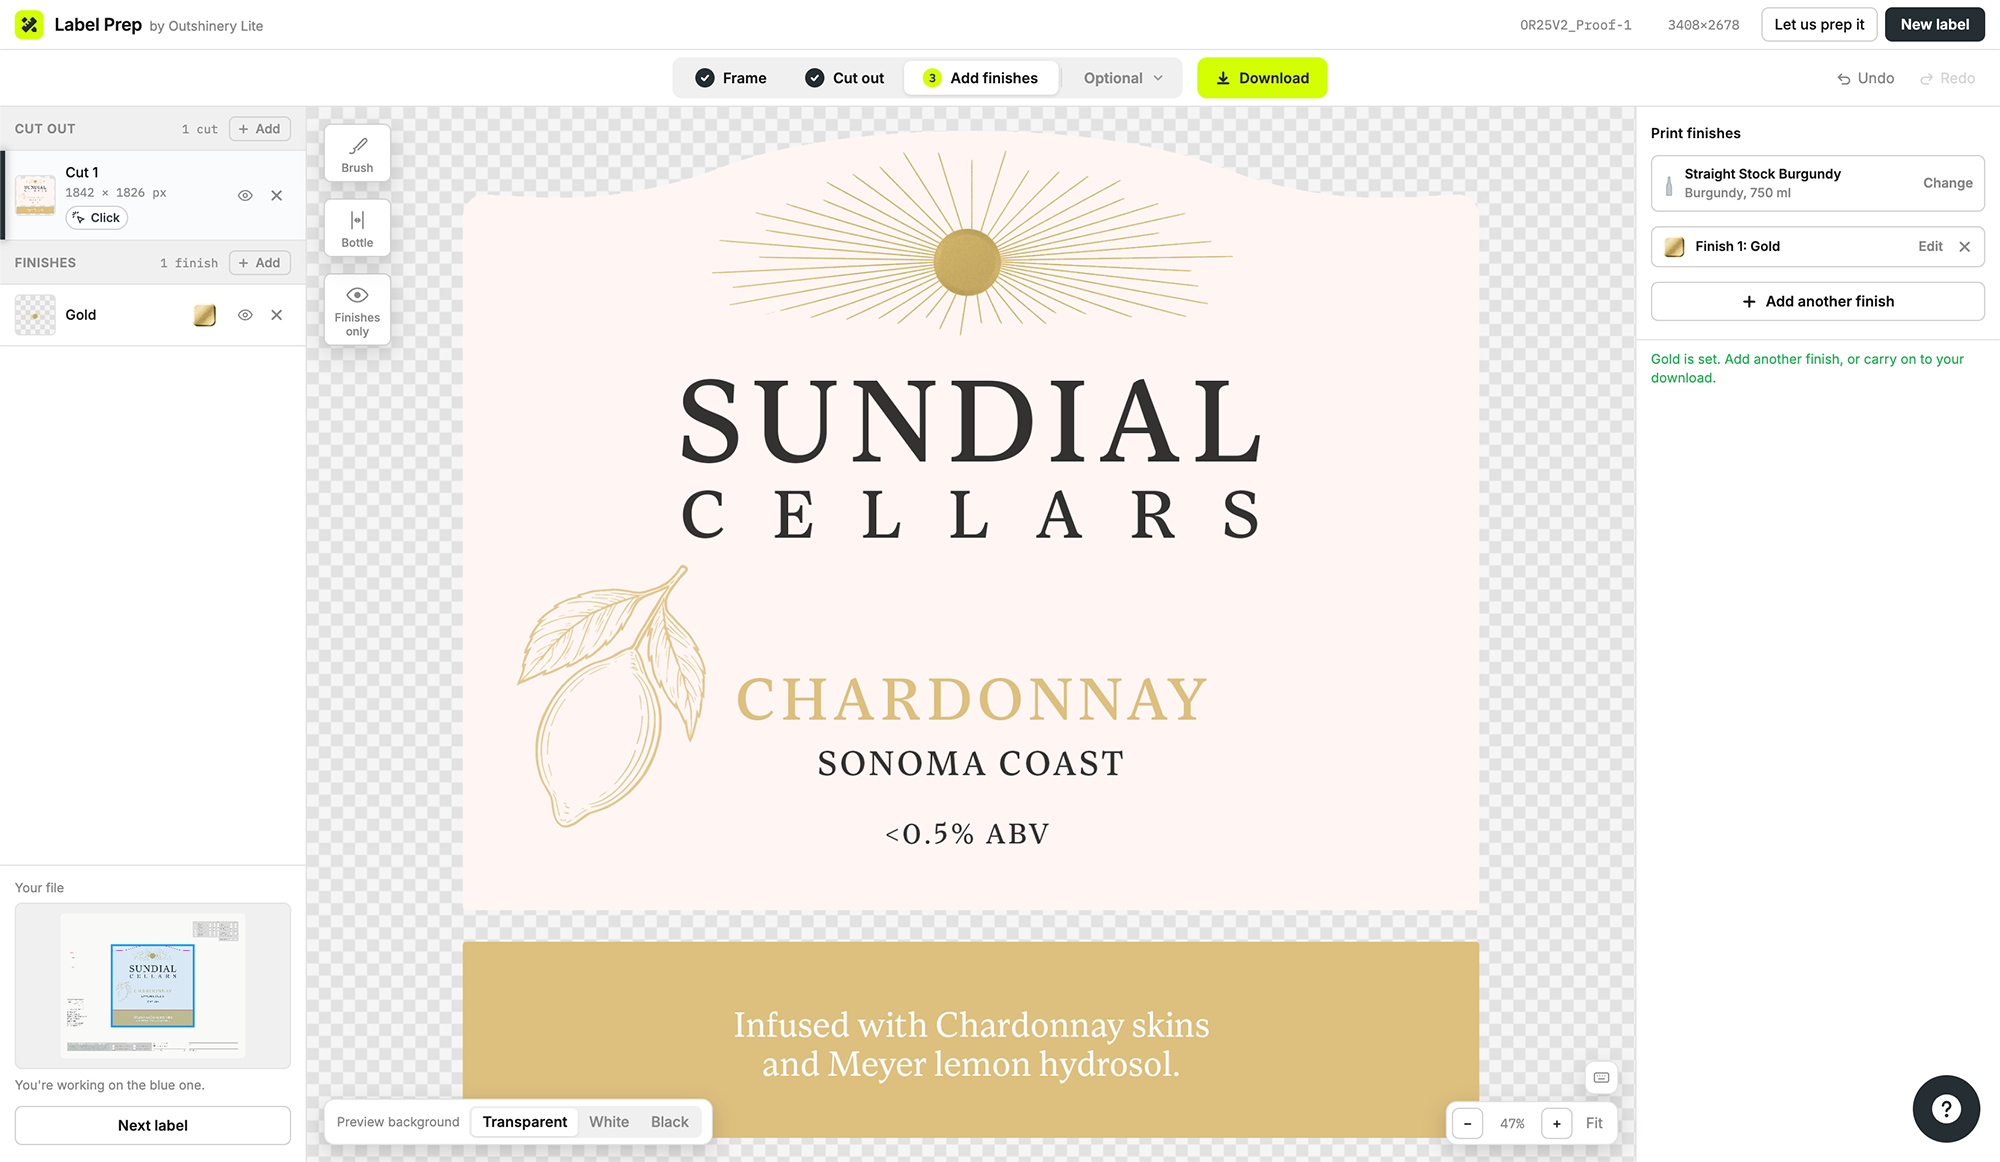
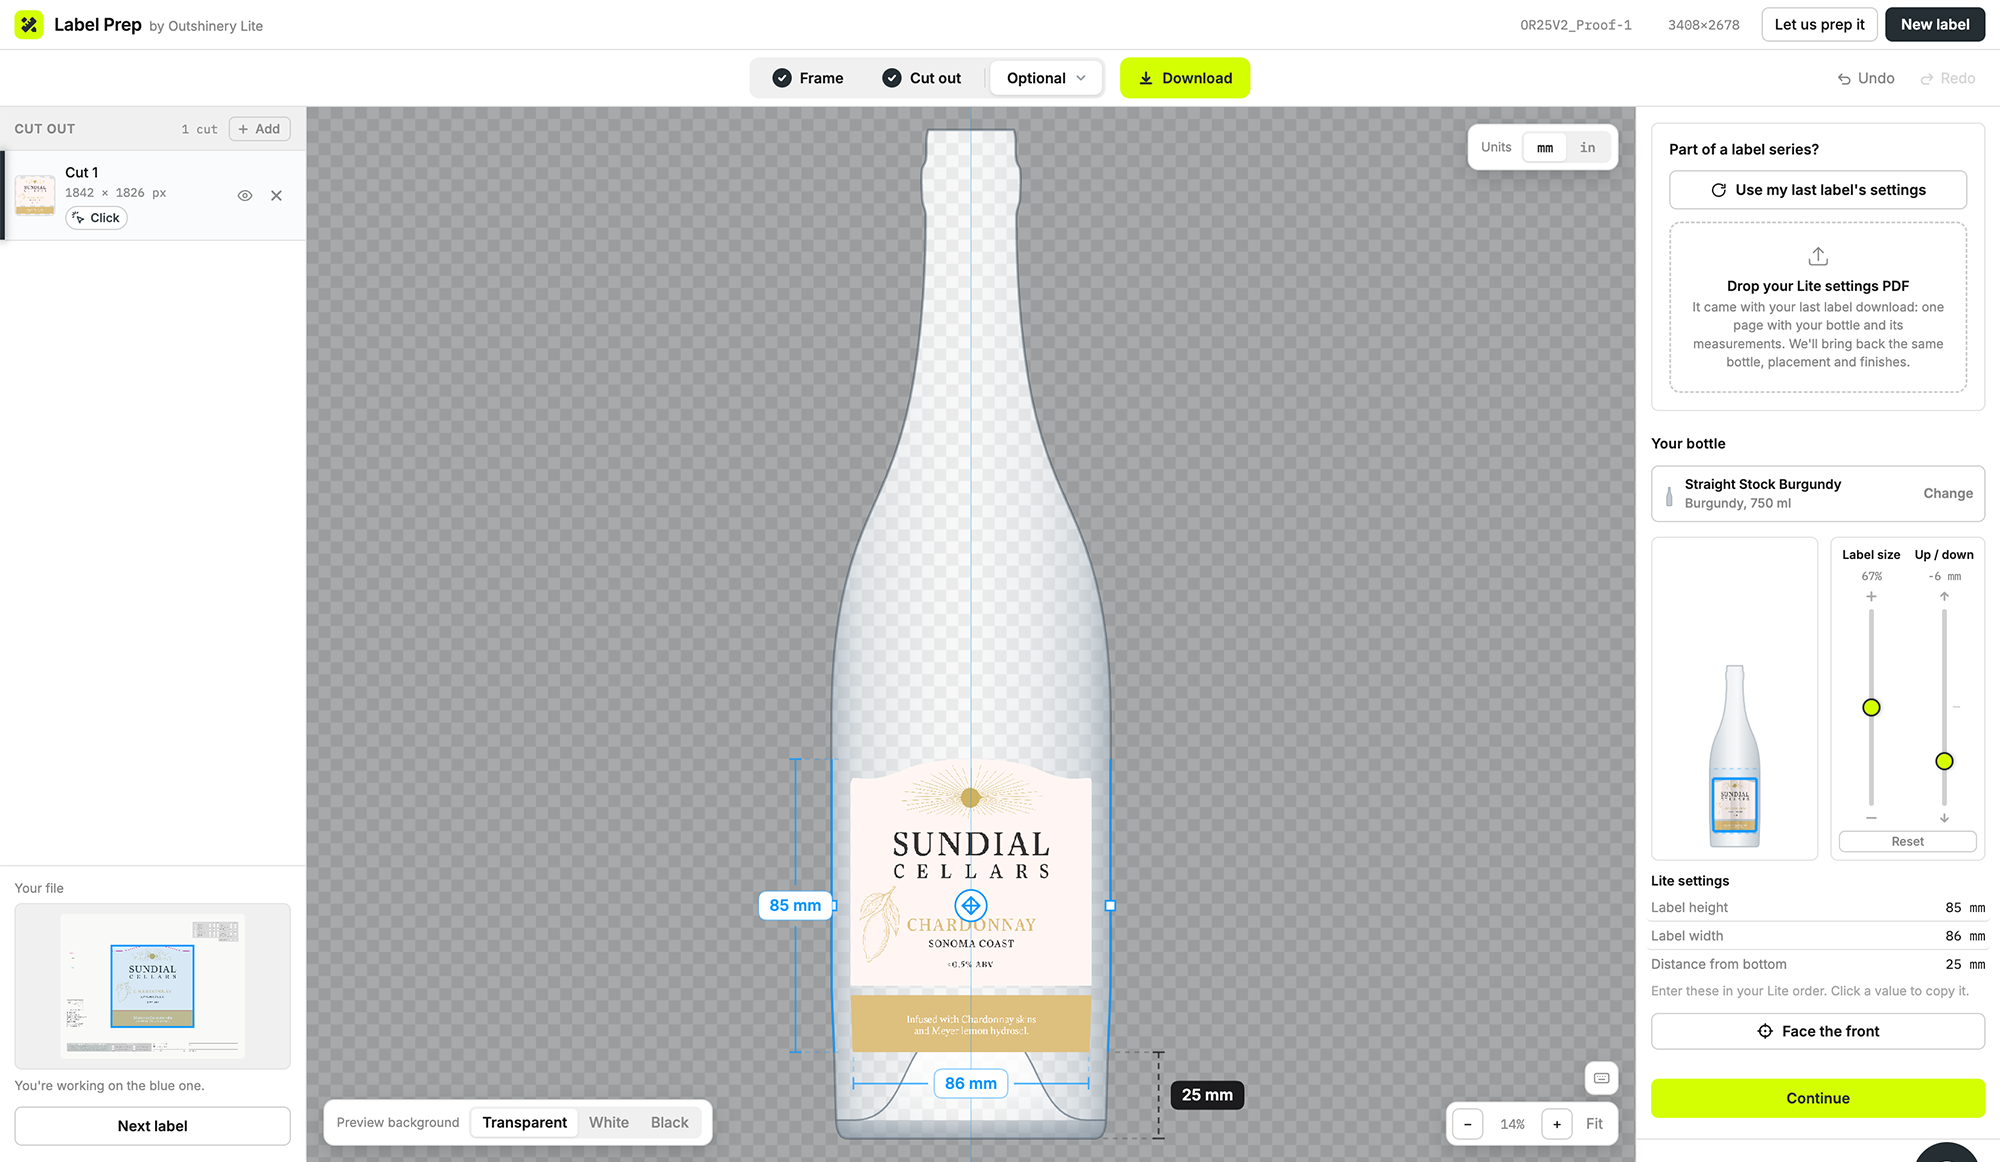
Go to Optional > Add finishes. You don't have to add a finish: the first screen is Your bottle. Pick Wine or Beer, the bottle family, then your exact bottle from the list.
Your label appears on the bottle with its height, width and distance from the bottom. Drag it into place, and switch between millimeters and inches at the top right.
5. Download
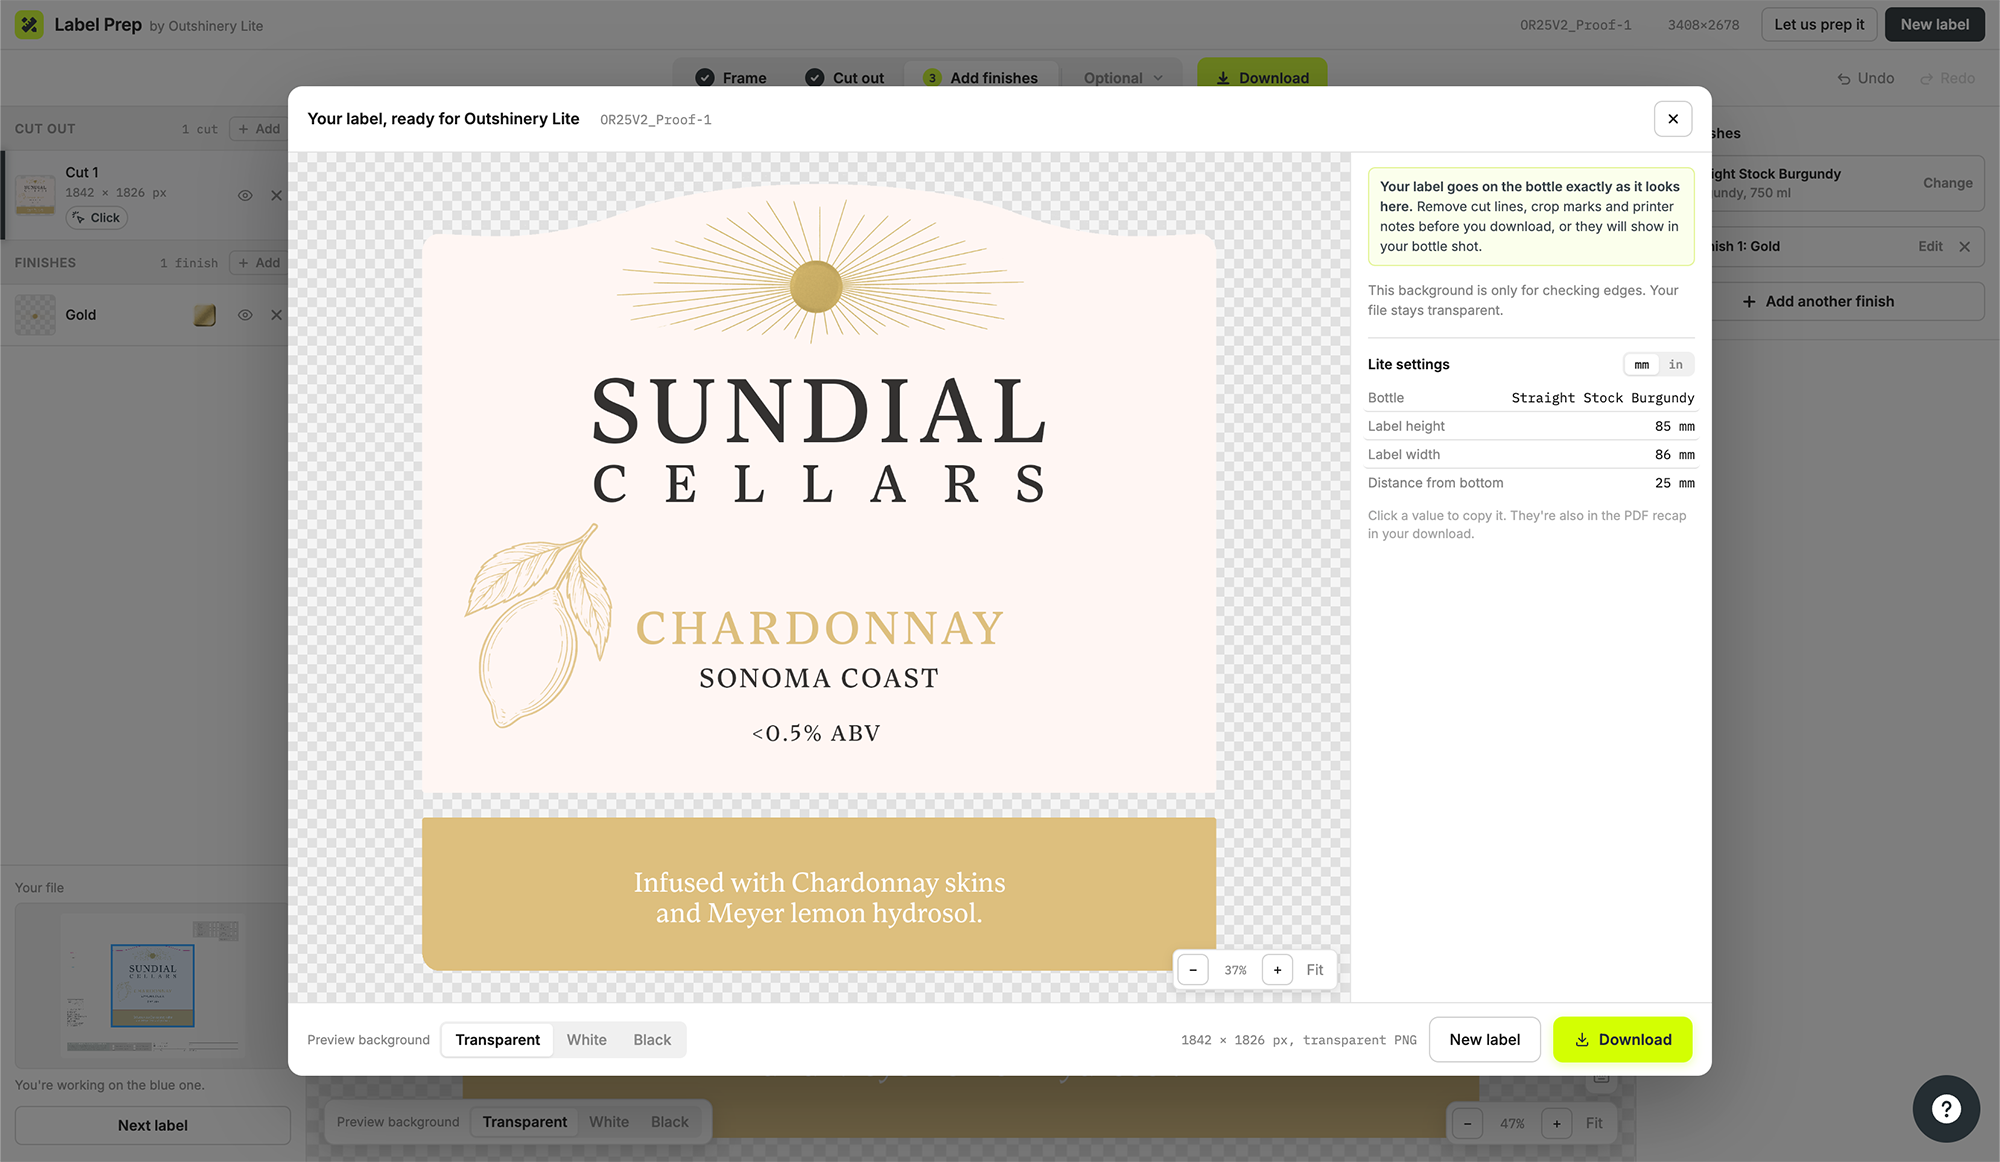
Click Download. The review window shows your label exactly as it will go on the bottle and, if you placed it, your Lite settings: bottle, label height, label width and distance from bottom. Click any value to copy it.
Click Download again. You get:
your transparent PNG, ready for Lite, and
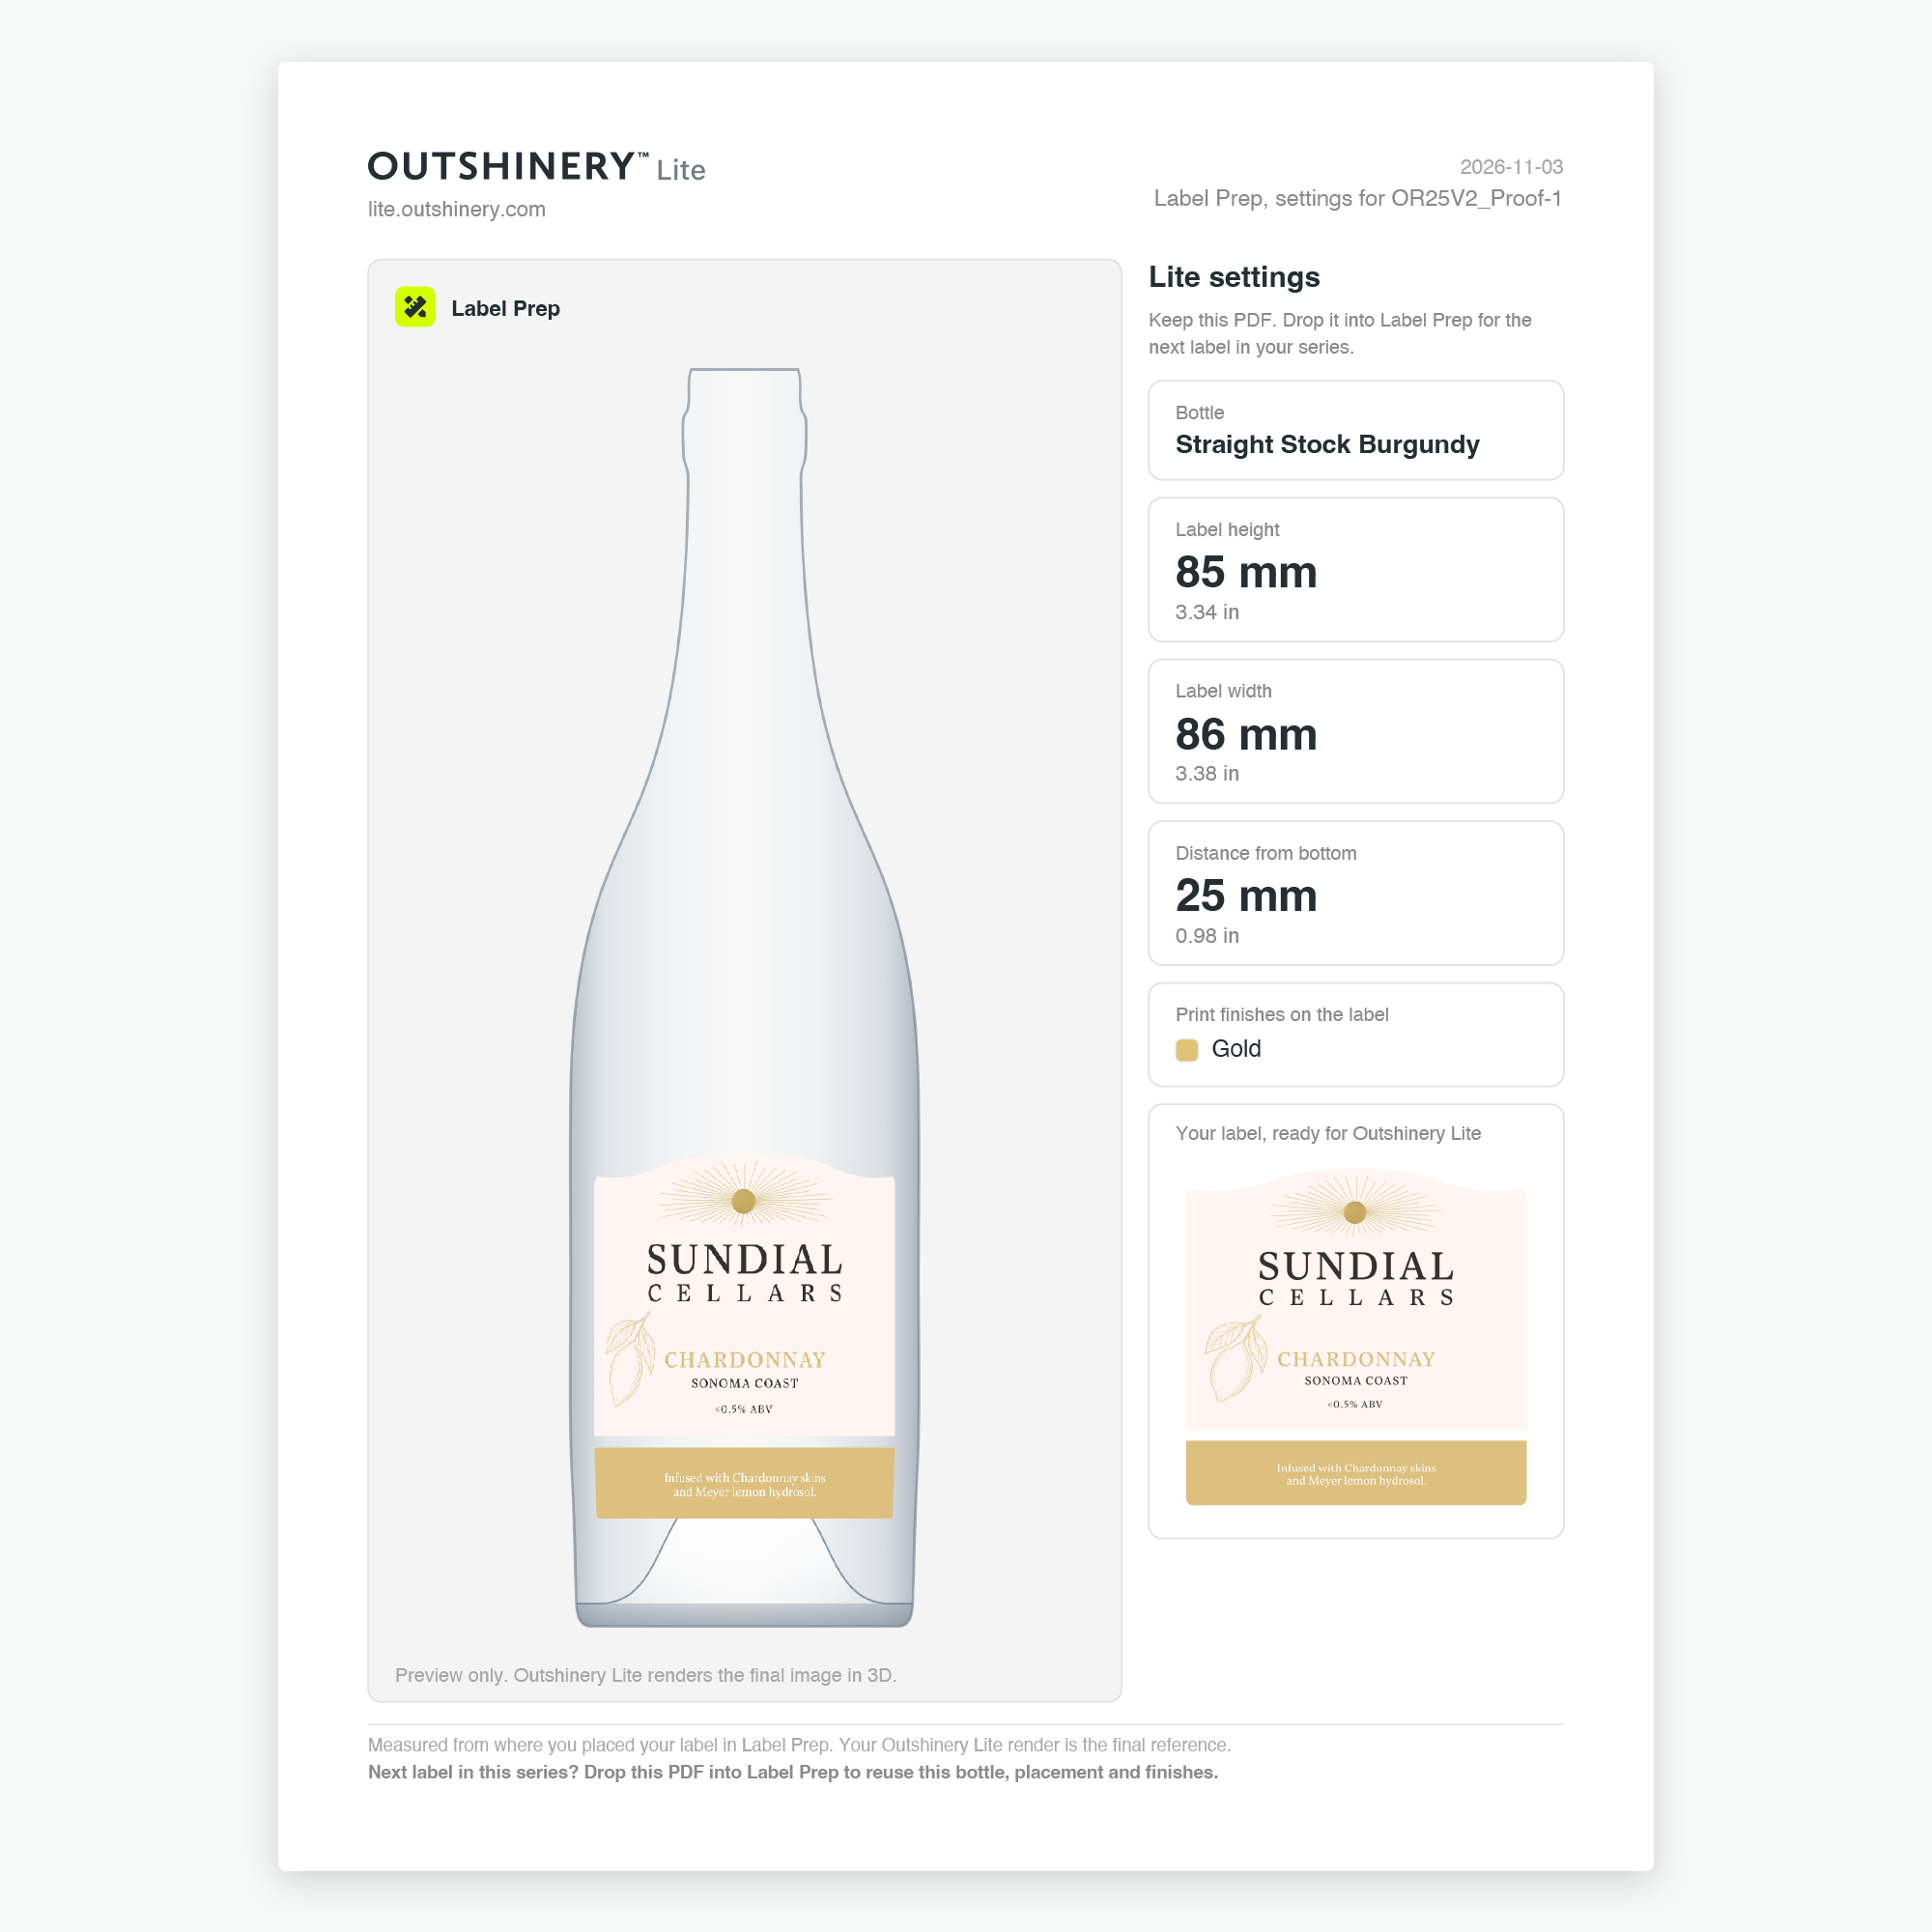
if you placed the label on a bottle, a Lite settings PDF with the same numbers, all in one zip.
Then click Start my Lite order and enter those numbers in the Lite builder.
The next label in your series
Open Label Prep with the next label, go to Optional > Add finishes, and drop your Lite settings PDF into Part of a label series? at the top. The same bottle, placement and finishes come back, and you can still change anything before you download.
Matching a label you already ordered
Every Lite order sends a recap email while it renders, with every setting used: bottle, closure, glass and liquid color, label height, label width, distance from bottom and rotation. Enter the same values for your next label and it lands in exactly the same spot.
When the tool can't handle your file
Some files are too tangled for the tool, usually a layered PDF or Adobe Illustrator file with every version and the dieline stacked on top of each other. Click Let us prep it in the tool, or request free label prep, and our team prepares it by hand and emails it back within 2 business days.